HOW TO CREATE A SIMPLE AND QUICK BLACK-WASH FINISH WHILE LEAVING SOME ORIGINAL STAIN PEEKING THROUGH.
Warning:: Some of you cherry wood stain lovers may prefer this before…
BUT…
This is one of those questions I get asked ALL the time – How to paint over stain while leaving some of the original stain color showing through? — so I hope this painted nightstand makeover sparks some ideas. 🙂
Over the years I’ve used various ‘distressing tricks’ to reveal the stain but today I’m sharing one of my favorites. It’s easy, it’s quick, and the results are stunning!
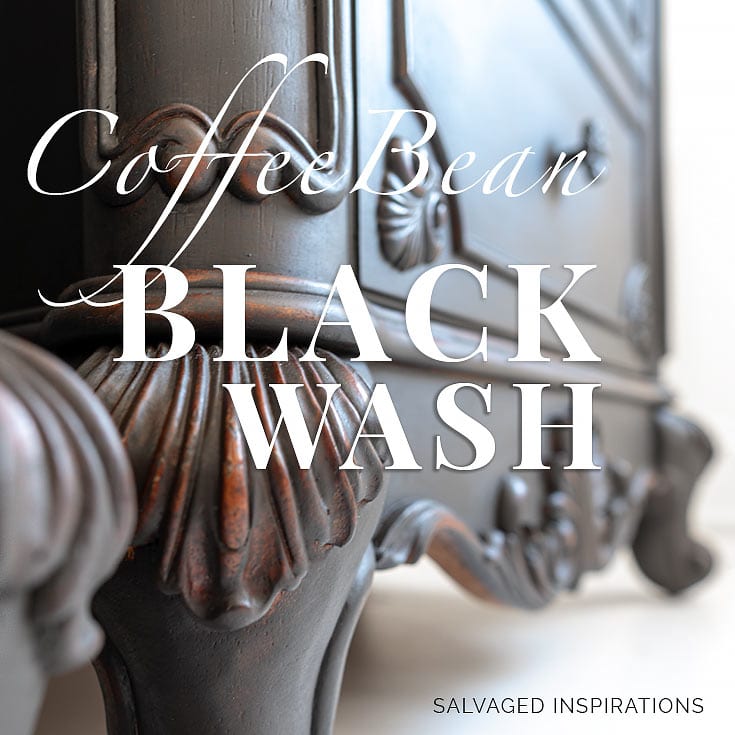
It’s a simple BLACK-WASH… and today it’s Coffee Bean Style!
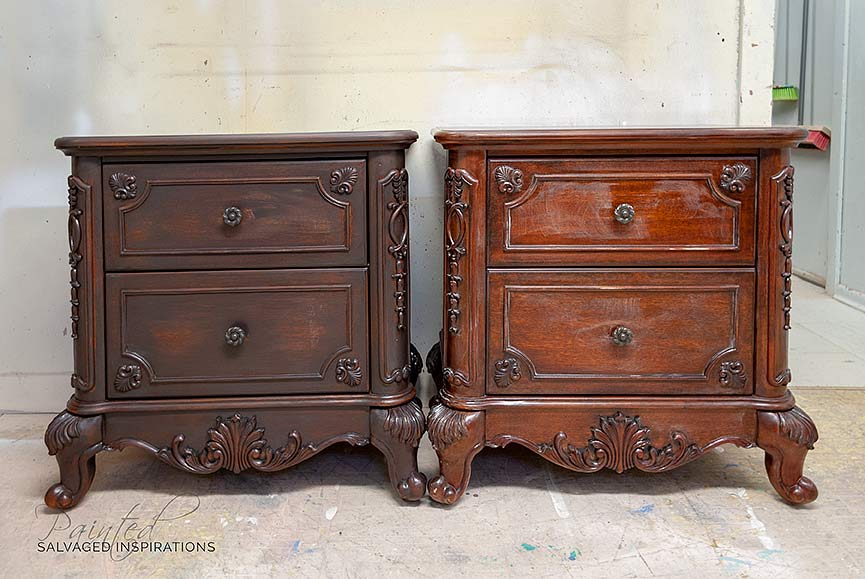
Here’s what I started with. It’s my part 2 of the bedroom set I splurged on last week. This set is not real cherry wood. It’s solid MDF covered in veneer but it’s simply gorgeous…. look at all this yummy detail!
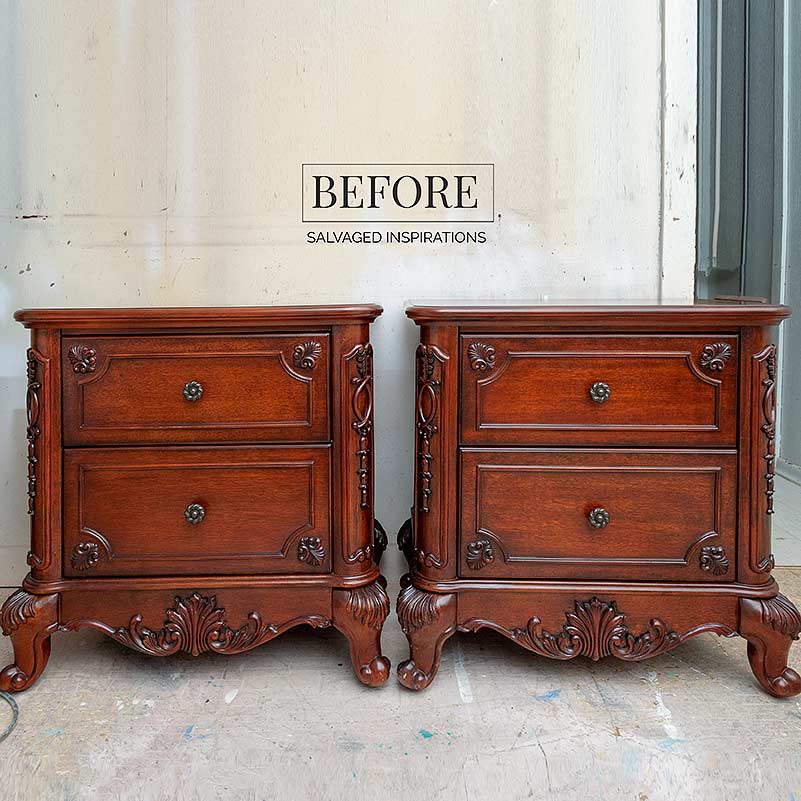
Although I love all the curves and scrollies, personally, I’m not fond of this cherry stain – it’s just TOO red.
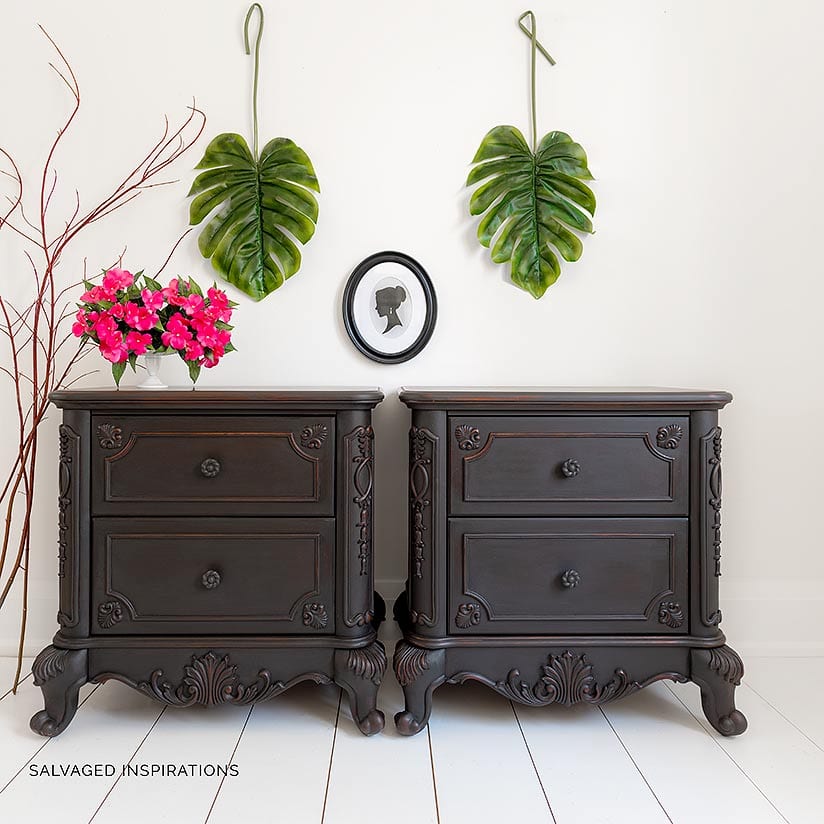
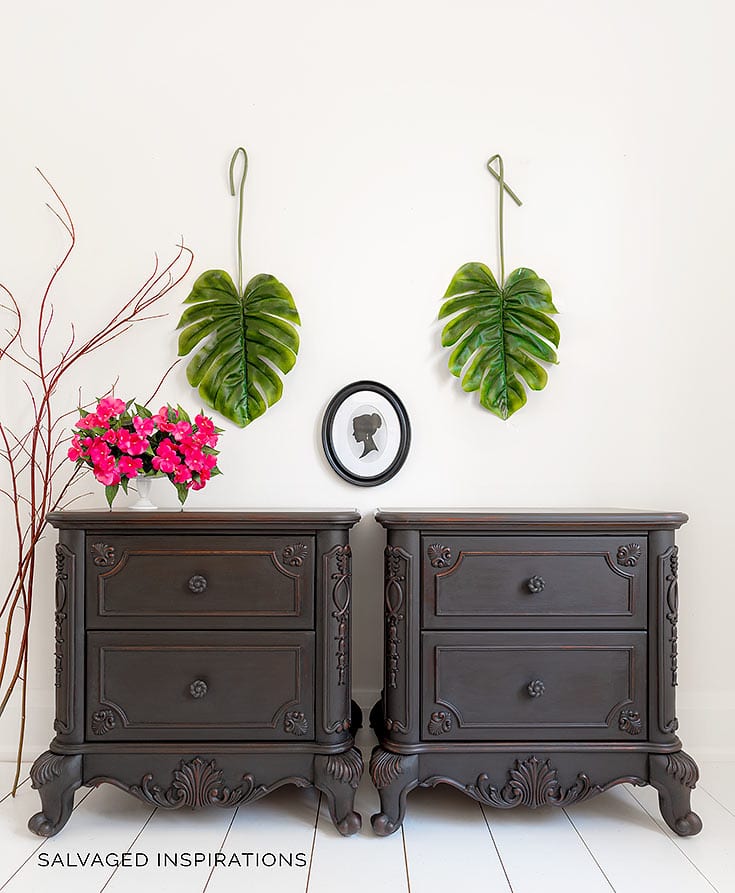
Here’s the updated AFTER with the Coffee-Bean Black Wash! What do you think?

 THIS POST IS SPONSORED/CONTAINS AFFILIATE LINKS TO PRODUCTS I USE. YOU CAN SEE MY FULL DISCLOSURE HERE.
 THIS POST IS SPONSORED/CONTAINS AFFILIATE LINKS TO PRODUCTS I USE. YOU CAN SEE MY FULL DISCLOSURE
 SOURCE LIST::
-
- 2 Nightstands – SALVAGED
- Sandpaper + Shop Towels
- Water
- Spray Mist Water Bottle
- Paint Brushes
- Coffee Bean Chalk Mineral Paint
- Black Wax
- Gator Hide
HOW TO BLACK WASH FURNITURE::
Black Washing is one of the easiest paint techniques and I find it’s effortless to control – there’s no right or wrong way to do this. I can leave as much or as little of the stain showing through depending on how thick I apply the wash and/or how many layers of wash I use.
The external flash on my DSLR needed new batteries and I had wet paint ready to wipe so I didn’t go upstairs to replace them but you can still clearly see the steps taken here.
Step #1:: Clean and Sand
Because this is a really slick surface, I did give this piece a light sanding with a 220 grit to create some ‘tooth’ for the paint to adhere to. Chalk/Mineral paints (including the Dixie Belle Coffee Bean I used on this piece) don’t require sanding because they stick well, but seeing as I sell my pieces I like taking the extra step on these types of shiny surfaces.
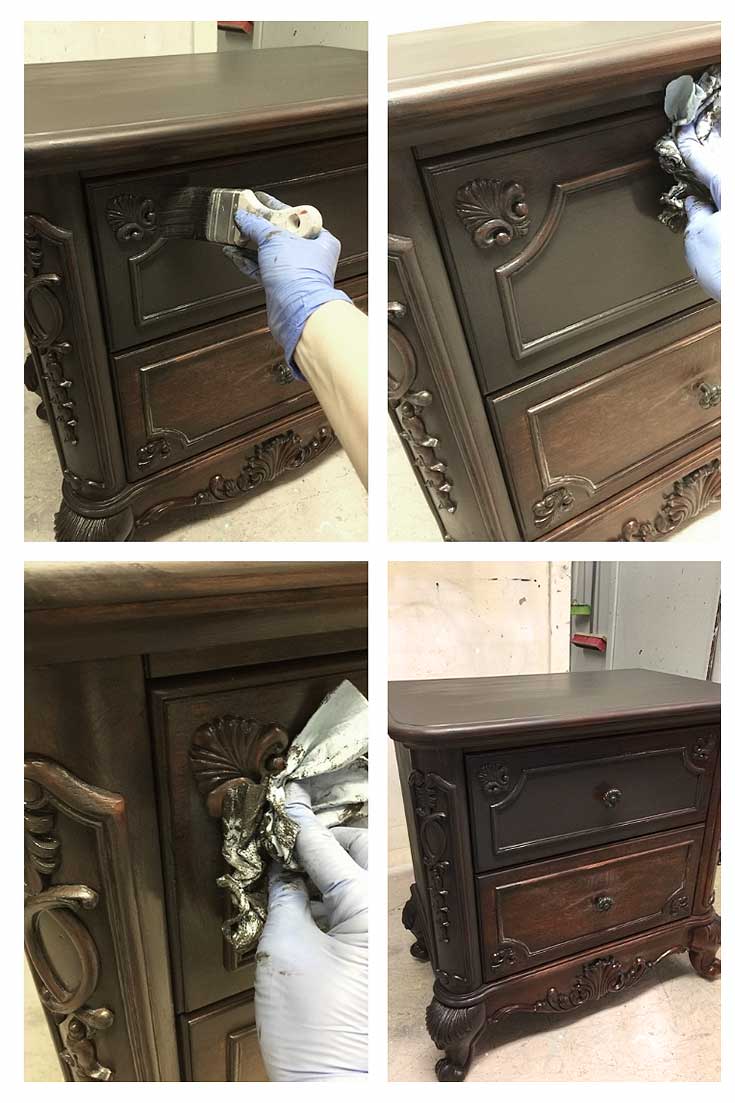
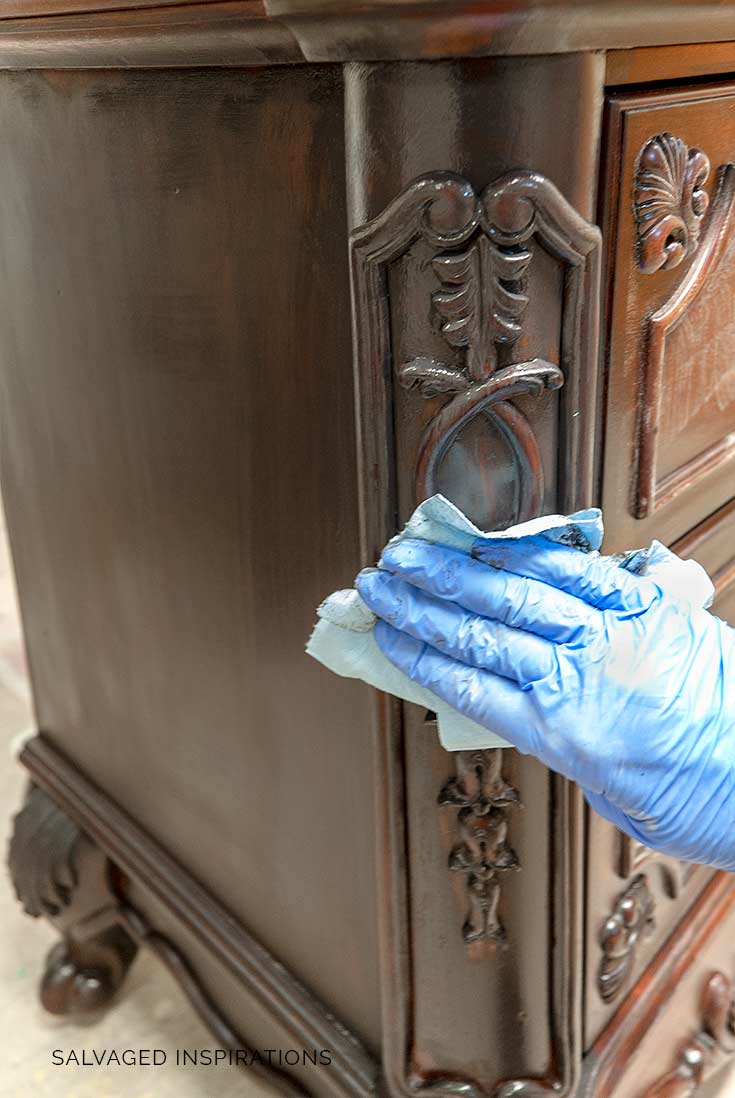
Step #2:: Apply Paint & Wipe Off
For these nightstands, I applied the paint full strength and then immediately wiped off the excess with a shop towel working in smaller areas so it’s still wet. I wipe it off the same way I wipe down my kitchen counter – nothing fancy!
Not a bad idea to wear gloves because it can get messy. 🙂
Step #3:: Spray And Soften
Once the excess paint has been wiped off, I give it a spay with my trusty water mister and smooth the paint out with a soft clean dry brush. I play with the paint until I like the effect.
Heavier black coverage ins some areas, and stain showing through in others. Here’s what it looked like after the first coat of wash.
Step #4:: Repeat
These painted nightstands took two (2) coats before I was happy with the look but you can manipulate the black wash to cover or expose as much of the stain as you like. Just keep playing until you like the look.
Step #5:: Topcoat
To create a rich Coffee-Bean depth, I applied black wax to the body and protected the top using Gator Hide.
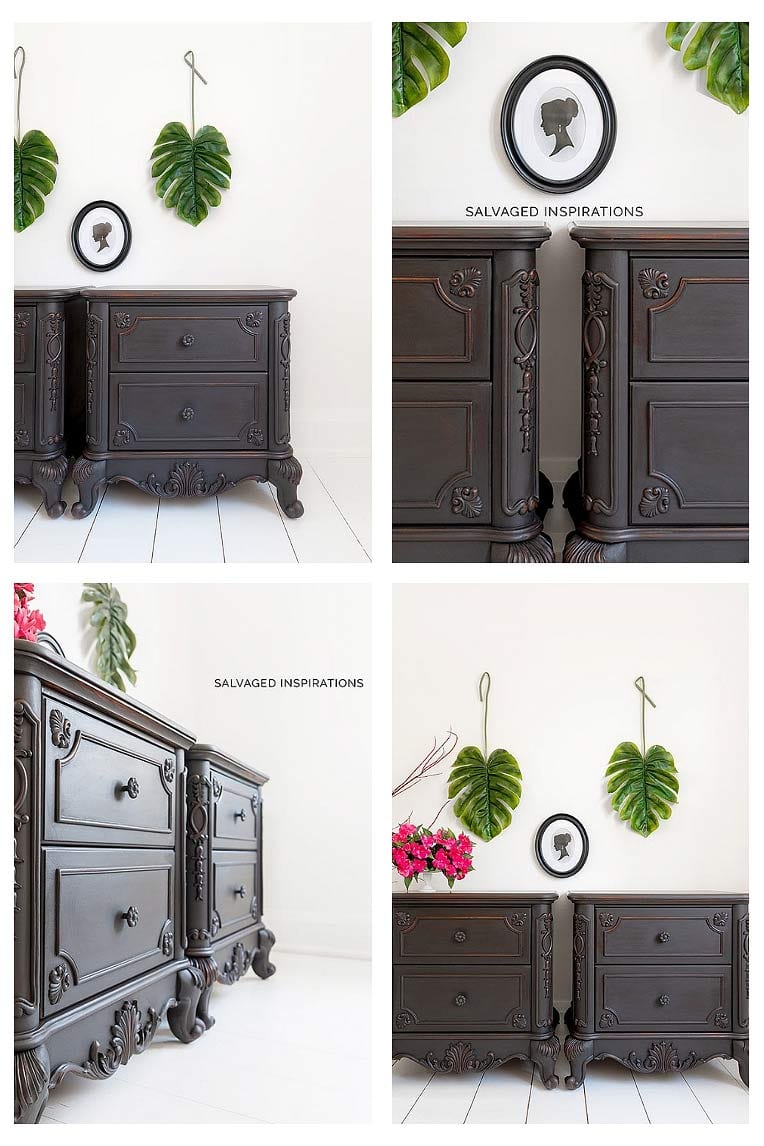
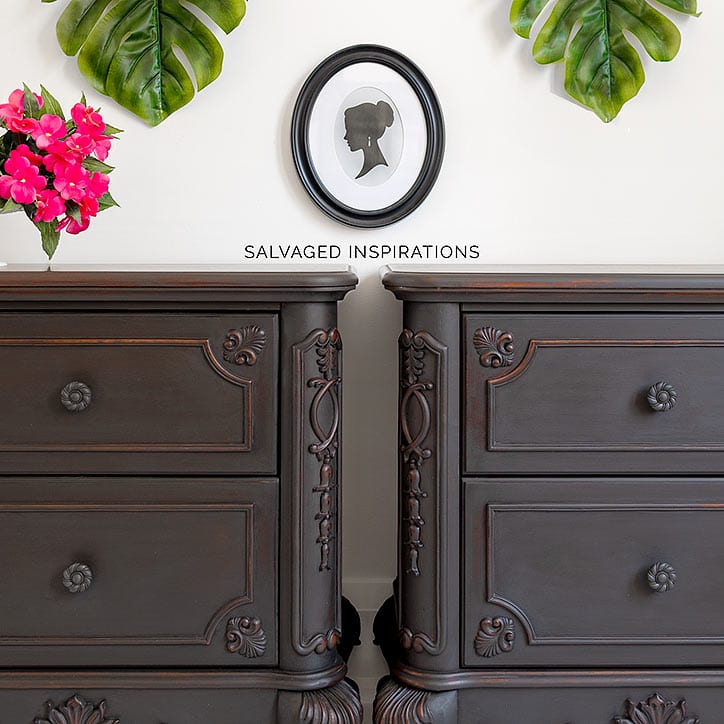
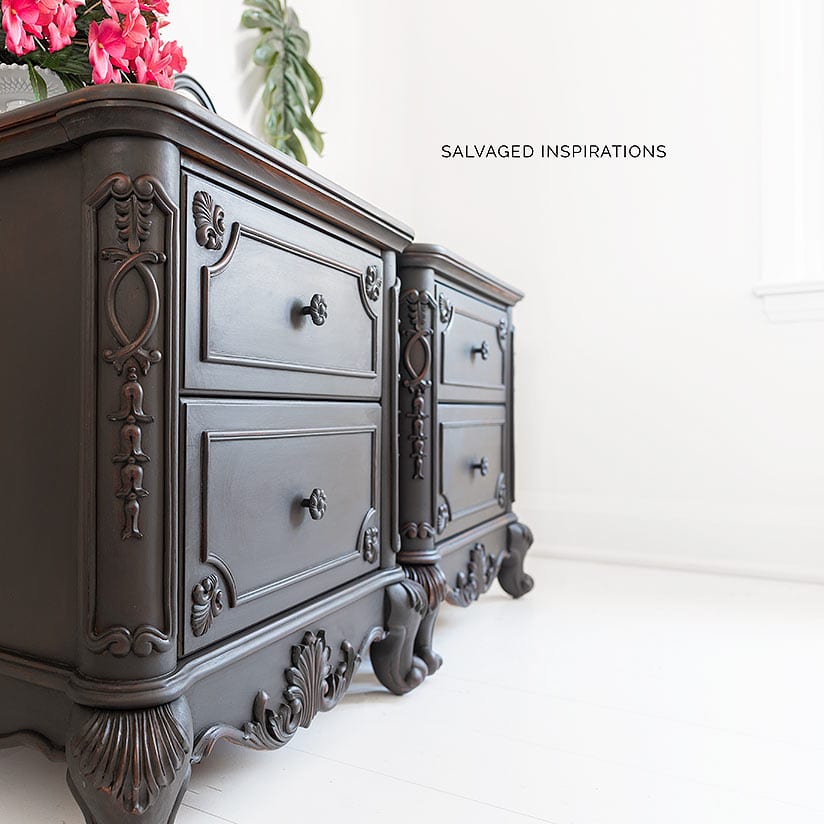
Here are a few close-ups….
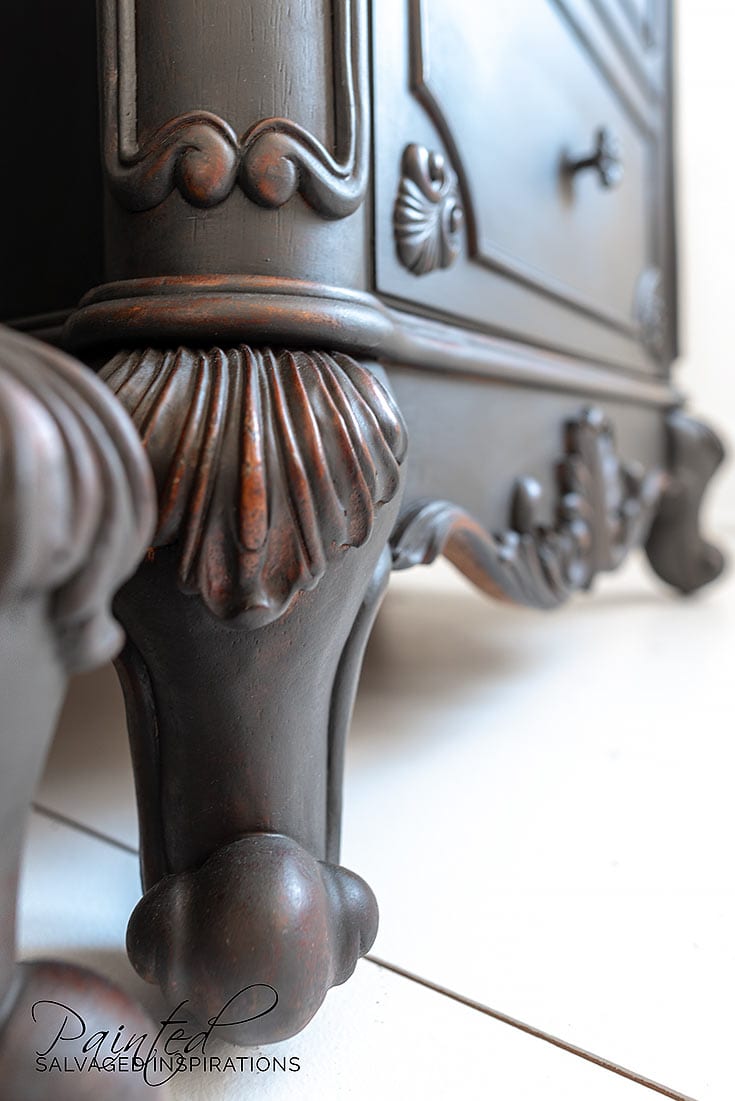
I love the cherry stain peeking through this rich brown/black Coffee Bean!
I hope this helps when you decide to create a peek-a-boo effect on one of your stained pieces!
ARE YOU A FAN OF PAINTED FURNITURE WITH THE ORIGINAL STAIN PEEKING THROUGH? FEEL FREE TO CHIME OR ASK ANY QUESTIONS YOU MAY HAVE… I ALWAYS LOVE HEARING FROM YOU.
Happy furniture painting my friends!
Denise x
RELATED POSTS::
Curbshopped Desk To Night Tables
Black Wash Wood Side Table
Pottery Barn Knock-Off Buffet Makeover
No Mess Wet Distress
Spring Inspired Dresser – Part 1
PIN AND SHARE!


Hi Denise. I used coffee bean Dixie bell chalk paint on a wash stand, but not sure how long to wait before applying the black wax and do I use the wax brush to apply and a soft cloth for buffing. I love your night stands!
Hi Carole! As soon as the paint is dry you can apply the wax. I usually apply it the very next day. And yes a soft cloth or brush to apply, and a soft cloth for buffing is perfect. 🙂
Hello,
I’m looking to do a black wash on an antique all metal trunk. Would it work the same way as the nightstands you did? or would i need to do something different being it’s on metal.
Thank you so much!
Hi Jay! If you’re using DB Paint, it does adhere nicely to a variety of surfaces. That said I would do a small test in an inconspicuous area and then do a scratch test (with your fingernail or a real nail) to make sure it’s adhering properly. If it scratches off, a light sanding will be helpful. Great project btw!
Me again. How do you apply wax? Do you leave it on? Wipe it off? Buff it? My piece os “blotchy” How long before you add a second coat? There is not much out there in video using Wise Owl wax.
Hi Lori! I’ve never tried Wise Owl wax but assuming its similar to other waxes out there, I wax on and wax off working in sections. I apply a small amount on my wax brush (but I’ve used lint free rags and even socks… they all work just as well) and apply it all over a drawer for example. Once the wax is all rubbed in, I use a shop towel (or clean lint free cloth) and rub any excess off right away. Then move on to the next drawer until my entire dresser is complete. I prefer to wait 24 hours before applying my second coat. I hope this helps. 🙂
I am doing a large chest of drawers in this black wash finish. I did the side of the chest in three different sections and it was very challenging to get it to appear as though I did them all at once. My question is did you use the soft brush and water up and down, every which way, across the grain. I tend to, out of habit, go with the grain at all times.
I am so inspired by your projects!! I am going to attempt your blackwashing technique on my dining room table and buffet. Would you recommend chalk /mineral paints or your side table blackwash mix for a dining room table? My objective is to give my dining table and buffet a darker finish (almost black but not opaque) a la “restoration hardware” look. Thank you for the inspiration! Cristina Liviero
Hi Christina! I would recommend a chalk/mineral paint. They work great for this technique!
Love this. Could latex satin paint be used instead of chalk paint? Would latex satin poly give a similar look as the black wax? Thank you
Hi Michelle! Yes and yes! 🙂
Hi Denise, Love love love those nightstands! Last year I painted an oak china hutch with DB gravel road paint. It turned out really well, but is too much of a blue-gray color. I am wondering if I could use the Caviar color wash over the existing color to make the overall color more on the black side. I lightly distressed the piece and wouldn’t mind if some of the gray showed through. Thoughts?
Hi Jan! I would try it! The Caviar wash will definitely darken your oak hutch up. You could always try a ‘test’ spot in an inconspicuous area to see if you like the colors together. 🙂
I would love to paint my dining room table with this technique.Do you think it would hold up well enough for everyday use?BTW love the night stands.They turned out beautifully!!!
Hi Bobbi! A dining room table (if prepped and top-coated/protected properly ie poly) would definitely hold up well enough using this finish. 🙂
This project is stunning. Going to do this on several pieces.
Thanks Vicki! Have fun. 🙂
Why did you apply black wax on it after it was washed ? Could you just use clear wax ?
Hi Deb! I used the black wax because I had it and it slightly deepens the black paint wash. But for sure. You can totally use a clear wax. It will look just as good. 🙂
I love love those nights but stands!! I am going to try this on an old dresser I have ! Thanks so much for sharing! Pat
Thanks Pat! Have fun with your dresser. 🙂
I really like how these turned out! I think a little stained wood showing is more interesting than flat black. And it seems like a very easy update! I think this is a very versatile color choice. Congrats on the excellent results!
Thanks, Kimmy! XO
Beautiful !! Simple solution to change the look completely. Thanks for sharing
Thanks Harjith!
Hi Denise, I loved this technique so much I just tried it on a dark stained drum table I had that I did not know what to do with 🤣. I have a couple questions: does the black wax cover the spots where the wood shows through? I would not like that.; and my table top is that shiny veneer that is often used on these tables, can I use the same technique on the top and did you? I can’t see the top of yours. Great work as always!
Hi Ellen! So glad you tried this on your drum table! Yes, the top is black washed and the black wax is applied to the entire piece to provide protection. But you could use clear wax or poly instead. It will work just as well and leave your wood intact. As for the shiny veneer, I would suggest giving it a light sanding to slightly scuff the surface for the wash to adhere to. Hope this helps. 🙂
This blackwash is beautiful! Thanks for sharing. I may use this on my next cherry piece.
Thanks Lori!
Hi Denise, Happy New Year to you! The black wash technique looks lovely, but I have a question. Looking at the photos you posted, is the final wax finish a flat finish or a satin finish? Sone photos look flat finish & a little dull. Other closeups look like a satin finish, which I think I’d prefer, with a light shine or soft sheen. Just curious. But I totally love the look and the great instructions! Beautiful!
Hi Liz and Happy New Year!!! Gator Hide is a flat finish. The black wax can be buffed to create a satin sheen if that’s your preference. Or, a satin poly would look great too! 🙂
Oh Denise, this is beautiful! Job well done!
Thanks so much, Jackie!🤗
I am using this technique on a buffet I plan to turn into a bathroom vanity. I am wanting to seal it since it will be in a bathroom and exposed to water regularly. I am looking for suggestions as to what I should use.. I am guessing the gator hide would not be strong enough. Would you use polyurethane, polycyclic? Also, wax over the poly coats??
Hi Jennifer! If it were my bathroom vanity, I would use Gator Hide. It’s SUPER durable. Easy to apply and easy to clean. It wipes down nicely AND it’s waterproof. Most other polys I’ve used are only water-resistant. That said, any poly for example, General Finishes, Minwax, Varathane etc will provide excelled protection if you apply it as instructed. As for wax, I would skip it. No need. 🙂
Love, love, love this! My husband gets frustrated with me cuz he says “you paint everything!. I have had a beautiful mahogany dresser for ver 40 years that I just feel needs an update. Will some of the grain still show through? The wood grain is my hubby’s favorite part. Maybe this would satisfy us both!
Thanks Sammie! And for sure. You can control how much black wash you apply and how much you wipe off. It would be easy to leave some grain showing through for your hubby! 🙂
Hi Denice. All your pieces are beautiful. I just bought to pieces of furniture at two different flea markets. One is a beautiful honey color with knotty pine bead board, a h iui tch with no bottom. The bottom was mahogany veneer. So…… I paid Ted bottom a deep mustard and stained over it with a good wipe down hoping to match. So close. Can I do a black wash or perhaps dark brown wash over that once the stain has cured. Need to deepen just stand. Thanks
Hi Mary Ellen! So long as the stain has cured, a wash is no problem. Have fun! 🙂
In other words Dixie Belle paints DO require sanding before painting, on any surface that has the slightest bit of shine. The chalk paint industry is lying.
Hi Sue! Dixie Belle Paints and ALL BRANDS of chalk/mineral paint have super adhesion in comparison to say a paint brand(s) you would buy at Home Depot for example. That said, if you’re working with a slick-shiny-surface, a light sanding to create some ‘tooth’ for the chalky-paints to adhere to is VERY beneficial. Whether I sand or not really depends on the individual piece and the painting technique I’ll be using.
Hi Denise. Greetings from Ireland! I just have to say in this big world of “painted furniture” enthusiasts like myself, you stand out!. I’ve found myself looking at your blog more than any other artist. – and I mean artist. I love your work! Every time I see anything on Pinterest etc that i think is really beautiful, it turns out to be yours! You’re so talented and I love everything you do! Keep inspiring us!!
Hello Mary from Ireland!!! Ireland is on my ‘hit list’ to visit one day… looks absolutely GORGEOUS! Anyway, thanks for the kind words and I’m SO HAPPY you’re finding the #siblog helpful. Look forward to chatting again. Have a super weekend. x
Hello, do you think this technique would be durable enough for a kitchen island? This would be an amazing way to update our golden oak kitchen without having to do it all!
Hi Denise! Would this process work on honey oak table and chairs? I have a dining set I would LOVE to turn dark!
Hi! I’m excited to try this. I have been wanting to refinish my dining room forever. I want to refinish s table, six chairs, buffet and a hutch. Can you give me any clue on how much of each product to get?
Thanks for any help you can give me.
Jamie
Hi Jamie! A full dining set is going to look AMAZING in the finish! The regular container of black wax should do it (very little wax is needed to get a good sheen) and I would recommend two (2) of the 32oz of Coffee Bean and one (1) 32oz Gator Hide. Good luck and have fun. I’d love to hear how it turns out for you. 🙂
Hi Denise. I was going back to look at how you did this because i have the perfect piece just for this. I just need to make sure i have it down right. You did NOT water down the Coffee Bean at all? Did you use a dry towel to wipe it off? After the wipe down you went in and misted the piece to even out the paint and then you repeated the process again. Is that correct?
You got it my friend. Perfectly correct. Next time I’ll get you to write the blog post. hehe 😉
Thank you so much for posting this. I love the look. Would you only use this technique for dark colors? Also did you let the first coat dry before applying the second coat? Thanks again for sharing!
Hi Jane! Yes, I let the first coat dry first before applying the second and personally, I prefer this technique with darker colors because it blends in with the wood better. But of course, it can work with ANY color you like. 🙂
Another technique I love & have to try on an old (antique?) RCA Victrola/radio my daughter gave me. It’s similar to a piece on your site that you refinished., It’s now a stained mahogany, somewhat distressed from of being moved around.
I have become addicted to your blog site and keep finding finishes for so many pieces of furniture I have, but could not find examples of what I wanted.
Quick question, do you ever use oil base paints like Rustolium, that can be used on wood or metal? I bought black & white so that I can mix for different shades of gray colors.
Any suggestions would be appreciated.;)
Hi Mary! I really try to stay away from oil based products. I do use some oil based stains and I’m addicted to BIN Shellac Primer which smells even worse than oil based products, but for the most part I stick to waterbased. That said, some ‘old-school’ furniture refinishers SWEAR by oil and won’t touch waterbased so it’s all personal preference. Rustoleum has amazing products with great adhesion so I’m sure your vintage radio will be stunning. Love those btw… lucky you! 🙂
I bought DB coffee been yesterday to do a black wash. I have never used the DB products so this article appeared at just the right time. Night stands are beautiful.
Thanks Debbie 🙂 … and you’re going to LOVE that Coffee Bean! It’s gorgeous! x
These are beautiful!!! I love this look!!!!
Thanks, my friend.. they sold super quick too! XO
Hi Denise!
Absolutely love the look! I have a buffet and china that I want to do with this technique. I have a can of Annie Sloan graphite chalk paint. Will I get the same effect or should I purchase the DB coffee bean color.
? Also, I was planning to use General Finishes in Java for the top of the buffet. Have you worked with this product.?
Thanks,
Denise
AS Graphite will work just as well… it’s just a slightly different color black. And yes, I’ve used my fair share of GF Java – love it!
I have a large china cabinet I want to try this on. The cherry wood was SO the style when we purchased it. I’m new to all this, my first attempt at painting anything except walls, so I think this would be a great way to tackle it. Heck, it was going to charity anyway, so if I mess it up …
That’s the attitude ReNae…woohoo! I love the saying “80% of success is just showing up.” I have my own version. 80% of a gorgeous makeover is just picking up a paintbrush!” 😉
Beautiful! How do u think this would work with a cream colored paint? Have u ever tried it.
Hi Tammy! I’ve never tried doing a cream wash over cherry stain so I’m not sure how it would look. That said, you can use this blackwash with ANY color and depending on the color and under stain, will give very different looks!
Love this then again I love all your woe
Just a quick question. Could I add Patina to this mix. Any suggestions would be so helpful.
Hi Roseann and for sure! Adding some patina would look amazing. Here’s a tutorial on how-to patina. I would start with this ‘wash’ technique and then add the patina just in the areas you want – maybe corners – around hardware etc.
These are just beautiful! I’m saving for future reference. My first attempt didn’t work. Sounds like I need to try Dixie Belle!
Thanks Maxine! And this technique can work with any brand of paint, but ya DB is amazing imo. 🙂
Beautiful work, I have a piece I would like to do black but was wondering instead of black paint could I get similar effect by black stain?
Hi Connie! Staining over stain is a totally different technique and will give you a different look. You might want to try staining it black in an inconspicuous and see if you like a black/cherry stain better! 🙂
The night stands are gorgeous! I have a small buffet that I was planning to paint a dark grey/black but I now want to try the black wash and leave some of the underlying stain showing through. Thanks for the great instructions and providing hope that all of us can have beautiful results trying something new.
Thanks Joanne! And if you decide to try this black wash technique on your small buffet – I’d love to hear how it goes for you! 🙂
Your night stands are cool and the finish is perfect on them. I’ve been wanting to try some Dixie Belle products–especially the Gator Hyde. I’ve heard good things about them. I enjoy finding your posts in my email!
Thanks Chris! And I love Gator Hide – I’ve been using it to protect the tops of ALL my pieces. It’s not only water resistant (like most polys) it’s waterproof! And the bonus is you CAN actually use it over DB’s waterbased waxes. If you ever give it a try, I’d love to hear what you think. 🙂
I just bought an oak colored drop leaf kitchen table that I’m going to refinish. Was thinking light, but now I want to go dark. This is a great idea! Can’t wait to get it started! Thanks for the inspiration!
It will look amazing with some oak peeking through. have fun!
You always do beautiful work!
Thanks so much! 🙂
Wow…just beautiful!! Thanks for sharing your technique ,,,just stunning
Thank you Patti! 🙂
The stands are gorgeous with only the first coat. In my opinion, they are too black with two coats.
That’s the beauty of this technique. You can apply as many or as few ‘washes’ as you like and gauge how much stain you want peeking through!
Hi Denise. These black washed night tables are absolutely beautiful. A total update from the red cherry stain. I love how they turned out and also love your instructions. Simple to read and follow. PERFECT, THANK YOU FOR SHARING!
You’re so sweet, thank you! And I think they look way more modern too. The red was too much for me! Have a beautiful day Monique! XO
Wow! What a fabulous color. Love the brown/black richness over the cherry. These pieces are magnificent.
Thanks Susie!! 🙂 I’m in love with this color too! 🙂
I have never heard of blackwash! I just happen to have a jar of DB Coffee Bean that I used on a piece and didn’t like at all. With so much white furniture everywhere, this technique is refreshing. The subtle cherry finish peeking through give the chests a rich look. I’m going to dig out the Coffee Bean right now! XOXO
Ohhh nooo, was it the piece you used it on?… wasn’t a great match maybe? I LOVE Coffee Bean — it’s such a rich looking black/brown and looks amazing with any color stain peeking through! Anyway, if you give blackwashing a try Cecilia, I’d love to hear how it works out for you. And let me know if you have any future success with Coffee Bean. I’m guessing there is a FAB future makeover in your future. 😉
Wow, this appeared in my in box at exactly the right time. I’m just about to paint a large, multi drawer dresser for my daughter. I’m using Annie Sloan black paint and dark wax. My daughter says she wants part of the brown stain to show in places, so I’m going to use your method! Thanks so much x
Oh amazing Tania! Feel free to let me know how it all works out for you and have some fun with it. It’s a little messy …but I’m always amused when I play with paint. 😉
Love this, you really did them justice. I agree about the cherry being too red. Great way to shave time off painting to perfection then sanding to distress too.
Thanks Tracy, and ya I’m not a fan of cherry stain. My office desk and bookshelves are this exact cherry color and I’m sick of them… I need a change!
First off, these nightstands are almost a perfect match to an old radio cabinet I inherited. If you lived near me I’d snatch these up in a heartbeat! I really like the look of the black wash finish because it updates the piece but highlights the stained wood underneath. Very pretty!
As I was saying to Tracy (previous comment) some of my office furniture is the same color stain and I would love to paint/wash them too! And lucky you with the old radio cabinet… I LOVE those! Are you keeping the insides intact or turning it into something else?
Love this effect Denise! Thanks for sharing.
Thanks Linda, gotta love an ‘easy’ makeover. 😉
Love the Black Coffee Bean finish. The night tables look absolutely beautiful. Thank you for sharing Denise.
Thanks Jill! I’m giving the Coffee Bean all the credit… it’s a gorgeous black-brown! 🙂
Holy Moly these are stunning! Love this look! Perfection to say the least. Thank you so much for the tutorial too!
Be blessed, Hope
Aw, thanks Hope! I like this look too… much more updated, right!?! 🙂
Hello Denise – I am not a fan of the ‘”red” stains either, and this is the perfect solution to the problem. Thanks so much for sharing this idea. I love the finished product.
Thanks, Julie… means a lot! 🙂 I thought I might get a few ‘reactions’ on covering this stain but it seems all positive so far.
I LOVE this look!!! Your work is always inspiring.
Thanks my friend. x
Love what you did with this black wash! Thank you for the picture of the”in-between” stage…it helps so much to see the progression!
Thanks so much Deb, and ya the batteries on my DSLR speed light went kaput but I’m glad you found the progress/diy pics helpful. 🙂